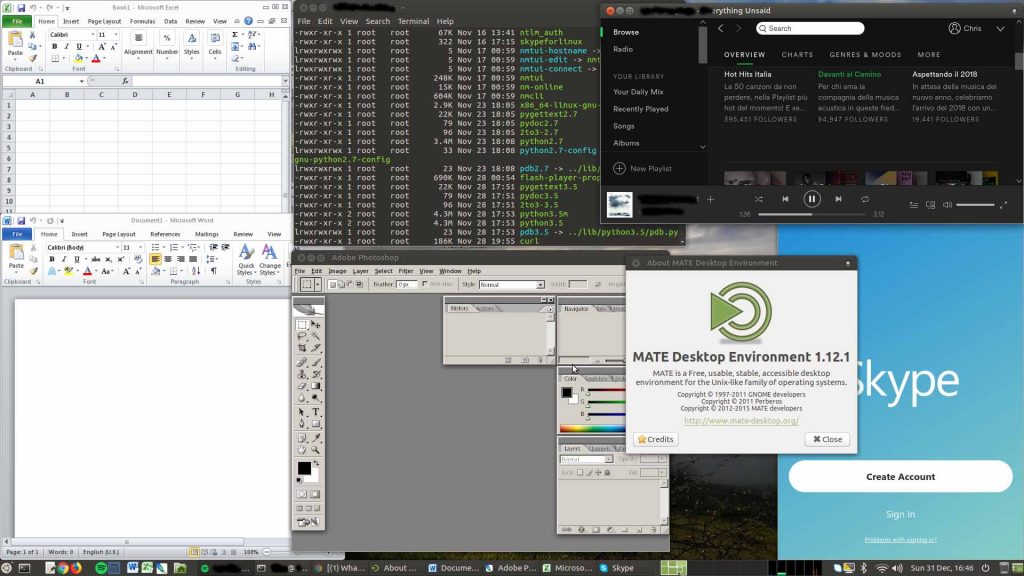
I can finally decommission my Windows VM!
Yes. I was keeping a Windows VM to use Office and Photoshop. Libreoffice and GIMP are alternative options that where not sufficient – at least for me. On top of that, Skype and Spotify were another couple of software that weren’t really working well or available (at least a while ago).
Now, I have a full working-workstation based on Ubuntu 16.04 LTS – MATE!

Desktop Screenshot
How to?
Well, here some easy instructions.
What you need?
- Office Pro 2010 license
- Office Pro 2010 installer (here where to download if you have lost it – 32bit version)
- Photoshop installer: Adobe has now released version C2 free. You need an Adobe account. They provide installer and serial. For the installer, here the direct link
- Spotify account
- Skype account
- Ubuntu 16.04 LTS 64 bit installed 🙂
Let’s install!
Spotify
For Spotify, I’ve just simply followed this: https://www.spotify.com/it/download/linux/
apt-key adv --keyserver hkp://keyserver.ubuntu.com:80 --recv-keys 0DF731E45CE24F27EEEB1450EFDC8610341D9410
echo deb http://repository.spotify.com stable non-free | sudo tee /etc/apt/sources.list.d/spotify.list
apt-get update
apt-get install spotify-client
Skype
For Skype, I have downloaded the deb from https://www.skype.com/en/get-skype/
wget https://go.skype.com/skypeforlinux-64.deb
dpkg -i skypeforlinux-64.deb
Office 2010 – Photoshop CS2
A bit more complicated how to install Office 2010 and Photoshop… but not too much 🙂
Just follow these instructions.
Firstly, we need to enable i386 architecture
dpkg --add-architecture i386
Then, add WineHQ repositories and install the latest stable version:
wget https://dl.winehq.org/wine-builds/Release.key
apt-key add Release.key
apt-add-repository 'https://dl.winehq.org/wine-builds/ubuntu/'
apt-get update && apt-get install --install-recommends winehq-stable
Install some extra packages, including winbind and the utility winetricks and create some symlinks
apt-get install mesa-utils mesa-utils-extra libgl1-mesa-glx:i386 libgl1-mesa-dev winbind winetricks

ln -s /usr/lib/i386-linux-gnu/mesa/libGL.so.1 /usr/lib/i386-linux-gnu/mesa/libGL.so
ln -s /usr/lib/i386-linux-gnu/mesa/libGL.so /usr/lib/i386-linux-gnu/libGL.so
NOTE: very importante the package winbind. Don’t miss this or Office won’t install.
Create the environment (assuming your user is called user)
mkdir -p /home/user/my_wine_env/

export WINEARCH="win32"
export WINEPREFIX="/home/user/my_wine_env/"
Install some required packages, using winetricks
winetricks dotnet20 msxml6 corefonts
After that, let’s make some changes to Wine conf.
winecfg
As described to this post, add riched20 and gdiplus libraries (snipped below):
Click the Libraries tab. Currently, there will be only a single entry for *msxml6 (native,built-in).
Now click in the ‘New override for library’ combo box and type ‘rich’. Click the down-arrow. That should now display an item called riched20. Click [Add].
In the same override combo box, now type ‘gdip’. Click the down-arrow. You should now see an item called gdiplus. Click on it and then click [Add]
Now… let’s install!
wine /path/installer/Setup.exe
This command is valid for both software: Office and Photoshop.
With this configuration, you should be able to complete the setup and see under “Others” menu (in Ubuntu MATE) the apps installed. Please note that you might need to reboot your box to see the app actually there.
During the Office setup, I choose the Custom setup, as I just wanted Word, Excel and Power Point. I selected “Run all from My Computer” to be sure there won’t be any extra to install while using the software, and after, I’ve de-selected/excluded what I didn’t want.
Once completed with the setup, if you don’t see the apps under “Others” menu, you can run them via command line (e.g. run Excel):
$ wine /home/user/my_wine_env/drive_c/Program\ Files/Microsoft\ Office/Office14/EXCEL.EXE
Office will ask to activate. I wasn’t able to activate it via Internet, so I have called the number found at this page.
The only issue I’ve experienced was that Word was showing “Configuring Office 2010…” and taking time to start. After that, I was getting a pop up asking to reboot. Saying “yes” was making all crashing. Saying “no” was allowing me to use Word with no issues.
I found this patch that worked perfectly:
reg add HKCU\Software\Microsoft\Office\15.0\Word\Options /v NoReReg /t REG_DWORD /d 1
Just do
wine cmd
and paste the above command, or
wine regedit
and add manually the key.
Apart of this… all went smoothly. I have been able also to install the language packs, using the same procedure
wine setup.exe
and I’m very happy now! 🙂
Have fun!

