This is the extract from this blog: Encrypted RAID on Mac OS X PDF document
Author Archives: thtieig
DNS updated via DHCP: BIND9 and ISC-DHCP on Linux
Linux: Debian stable (currently version 7)
Packages:
apt-get install install bind9 isc-dhcp-serverCreate a key required for DHCP server to update the DNS zones:
/usr/sbin/rndc-confgen -aThis will create /etc/bind/rndc.key, whose contents will look something like this:
key "rndc-key" {
algorithm hmac-md5;
secret "+zZSeeetHWFdNwECit1Ktw==";
};
BIND configuration
Configuration files:
/etc/hosts
127.0.0.1 localhost
10.0.60.60 dns.lab.loc dns

# The following lines are desirable for IPv6 capable hosts
::1 localhost ip6-localhost ip6-loopback
ff02::1 ip6-allnodes
ff02::2 ip6-allrouters
/etc/bind/named.conf.local
// Do any local configuration here
// Consider adding the 1918 zones here, if they are not used in your organization
include "/etc/bind/zones.rfc1918";

include "/etc/bind/rndc.key";

zone "lab.loc" {
type master;
file "/etc/bind/db.lab.loc";
allow-update { key rndc-key; };
};

zone "60.0.10.in-addr.arpa" {
type master;
file "/etc/bind/db.10.0.60";
allow-update { key rndc-key; };
};
/etc/bind/named.conf.options
(just to setup the external forwarders)
options {
directory "/var/cache/bind";

// If there is a firewall between you and nameservers you want
// to talk to, you may need to fix the firewall to allow multiple
// ports to talk. See http://www.kb.cert.org/vuls/id/800113

// If your ISP provided one or more IP addresses for stable
// nameservers, you probably want to use them as forwarders.
// Uncomment the following block, and insert the addresses replacing
// the all-0's placeholder.

forwarders {
208.67.222.222;208.67.220.220;8.8.8.8;8.8.4.4;
};

//========================================================================
// If BIND logs error messages about the root key being expired,
// you will need to update your keys. See https://www.isc.org/bind-keys
//========================================================================
dnssec-validation auto;

auth-nxdomain no; # conform to RFC1035

allow-query {
10.0.60/24;
127.0.0.1;
};
allow-transfer {
10.0.60/24;
127.0.0.1;
};

listen-on-v6 { any; };
};
/etc/bind/db.lab.loc
$ORIGIN lab.loc.
$TTL 24h ;$TTL (DNS time-to-live setting) used for all RRs without explicit TTL value

;SOA - Start of Authority. This is the record that states that this server is authoritative for the specified domain
;The SOA record lists the name server for the domain, and next the e-mail address of the administer of the domain
;(note that the @ has been replaced by a period).
@ IN SOA dns.lab.loc. root.lab.loc. (
2014032109 ; serial YYYYMMDDNN
10800 ; refresh (3 hours)
1800 ; retry (30 minutes)
604800 ; expire (1 week)
38400 ; minimum (10 hrs 40 min)
)
IN NS dns.lab.loc. ;Specifies the name server to use to look up a domain
; IN NS dns2.lab.loc. ;Specifies the name server to use to look up a domain
IN A 10.0.60.60 ; IP Address(es) of the DNS server(s)
; IN A 10.0.60.61 ; IP Address(es) of the DNS server(s)
IN MX 10 dns.lab.loc. ;Specifies mail server(s) for the domain

; HOSTS
dns IN A 10.0.60.60
;dns2 A 10.0.60.61

esxi01 IN A 10.0.60.71
esxi02 IN A 10.0.60.72
esxi03 IN A 10.0.60.73

freenas IN A 10.0.60.80

mail IN CNAME dns
dnsmaster IN CNAME dns
storage IN CNAME freenas
/etc/bind/db.10.0.60
; BIND reverse file for lab.loc
$ORIGIN 60.0.10.in-addr.arpa.
$TTL 24h
@ IN SOA dsn.lab.loc. root.lab.loc. (
2014032104 ; serial number YYMMDDNN
10800 ; Refresh (3 hours)
3600 ; Retry (1 hour)
604800 ; Expire (1 week)
38400 ; Min TTL (10 hours 40 minutes)
)
IN NS dns.lab.loc.
; IN NS dns2.lab.loc.

;LIST OF HOSTS (reverse)

60 IN PTR dns.lab.loc.

71 IN PTR esxi01.lab.loc.
72 IN PTR esxi02.lab.loc.
73 IN PTR esxi03.lab.loc.

80 IN PTR freenas.lab.loc.
DHCP configuration
Here there is just one file that has to be modified: dhcpd.conf
/etc/dhcp/dhcpd.conf
Here we need to enter the key in plain text.
# DHCPD
ddns-updates on;
ddns-update-style interim;
update-static-leases on;
authoritative;
key rndc-key { algorithm hmac-md5; secret +zZSeeetHWFdNwECit1Ktw==;}
allow unknown-clients;
use-host-decl-names on;
default-lease-time 1814400; #21 days
max-lease-time 1814400; #21 days
log-facility local7;

# lab.loc DNS zones
zone lab.loc. {
primary localhost; # This server is the primary DNS server for the zone
key rndc-key; # Use the key we defined earlier for dynamic updates
}
zone 60.0.10.in-addr.arpa. {
primary localhost; # This server is the primary DNS server for the zone
key rndc-key; # Use the key we defined earlier for dynamic updates
}

# lab.loc LAN scope
subnet 10.0.60.0 netmask 255.255.255.0 {
range 10.0.60.100 10.0.60.200;
option subnet-mask 255.255.255.0;
option routers 10.0.60.2;
option domain-name-servers 10.0.60.60;
option domain-name "lab.loc";
ddns-domainname "lab.loc.";
ddns-rev-domainname "in-addr.arpa.";
}

# lab.loc STATIC assigned group
group {
host freenas.lab.loc {
hardware ethernet 00:0c:29:18:af:b4;
fixed-address 10.0.60.80;
ddns-hostname "freenas";
}
host esxi01.lab.loc {
hardware ethernet 00:0c:29:d4:14:ce;
fixed-address 10.0.60.71;
ddns-hostname "esxi01";
}
host esxi02.lab.loc {
hardware ethernet 00:0c:29:2c:30:fd;
fixed-address 10.0.60.72;
ddns-hostname "esxi02";
}
host esxi03.lab.loc {
hardware ethernet 00:0c:29:46:90:fd;
fixed-address 10.0.60.73;
ddns-hostname "esxi03";
}
}
Once everything is configured, just restart bind and dhcp:
/etc/init.d/bind9 restart && /etc/init.d/isc-dhcp-server restart
Sources:
https://www.centos.org/docs/4/html/rhel-rg-en-4/s1-bind-zone.html
XDM custom login
Here the installing script.
xdm_custom.tar
Here the final result:
Sources:
http://cafim.sssup.it/~giulio/other/Customization_XDM.html
http://go.kblog.us/2012/10/setting-up-xdm-on-debianubuntu-linux.html
BASH: check if a package is installed [Debian/Ubuntu]
Example: checks if the packages in the variable pks are installed. If not, update and install without prompt
 #Packages
pks="root-tail xdm"
echo "Installing required packages if missed"
dpkg-query -l $pks
if [ "$?" != "0" ]
then apt-get update && apt-get -y install $pks
fi
BASH: Current Script folder
#!/bin/bash
# Name: /tmp/demo.bash :
# Purpose: Tell in what directory $0 is stored in
# Warning: Not tested for portability
# ------------------------------------------------

## who am i? ##
_script="$(readlink -f ${BASH_SOURCE[0]})"

## Delete last component from $_script ##
_base="$(dirname $_script)"

## Okay, print it ##
echo "Script name : $_script"
echo "Current working dir : $PWD"
echo "Script location path (dir) : $_base"Minimal X server – Less then 1.2GB
Packages required:
apt-get install xinit blackbox menu xterm xdmFull list of packages installed (including dependencies):
blackbox fontconfig-config libaudit0 libbt0 libdrm-intel1 libdrm-nouveau1a libdrm-radeon1 libdrm2 libffi5 libfontconfig1 libfontenc1 libgl1-mesa-dri libgl1-mesa-glx libglapi-mesa libice6 libmtdev1 libpciaccess0 libpixman-1-0 libsm6 libutempter0 libx11-xcb1 libxaw7 libxcb-dri2-0 libxcb-glx0 libxcb-shape0 libxcb-util0 libxcomposite1 libxdamage1 libxfixes3 libxfont1 libxft2 libxi6 libxinerama1 libxkbfile1 libxmu6 libxpm4 libxrandr2 libxrender1 libxt6 libxtst6 libxv1 libxvmc1 libxxf86dga1 libxxf86vm1 menu ttf-dejavu-core x11-common x11-utils x11-xkb-utils xbitmaps xfonts-base xfonts-encodings xfonts-utils xinit xserver-common xserver-xorg xserver-xorg-core xserver-xorg-input-all xserver-xorg-input-evdev xserver-xorg-input-mouse xserver-xorg-input-synaptics xserver-xorg-input-vmmouse xserver-xorg-input-wacom xserver-xorg-video-all xserver-xorg-video-apm xserver-xorg-video-ark xserver-xorg-video-ati xserver-xorg-video-chips xserver-xorg-video-cirrus xserver-xorg-video-fbdev xserver-xorg-video-i128 xserver-xorg-video-intel xserver-xorg-video-mach64 xserver-xorg-video-mga xserver-xorg-video-neomagic xserver-xorg-video-nouveau xserver-xorg-video-openchrome xserver-xorg-video-r128 xserver-xorg-video-radeon xserver-xorg-video-rendition xserver-xorg-video-s3 xserver-xorg-video-s3virge xserver-xorg-video-savage xserver-xorg-video-siliconmotion xserver-xorg-video-sis xserver-xorg-video-sisusb xserver-xorg-video-tdfx xserver-xorg-video-trident xserver-xorg-video-tseng xserver-xorg-video-vesa xserver-xorg-video-vmware xserver-xorg-video-voodoo xterm cpp cpp-4.7 libgmp10 libmpc2 libmpfr4 libxcursor1 x11-xserver-utils xdmI personally needed a light editor, possibly not related to KDE or Gnome (which generally means plenty of packages installed).
I found Leafpad, which does the job. So, I generally install it as well:
With these packages, you should have a very light X environment, with xterm, a basic text editor and a basic bar with workspaces and current time.
Super basic. Super light. Super Functional. 🙂
I liked also to customise the menu, because the default one was too messy for me.
To do this, create a .blackboxrc file if not present in your home directory.
After, just add the following:
session.menuFile: ~/.blackbox/blackbox-menuOf course, make sure to have also a folder called .blackboxand the file blackbox-menu customised like this one:
[begin] (MinimalMenu)
[exec] (XTerm) {xterm}
[exec] (LeafPad) {/usr/bin/leafpad}
[submenu] (Blackbox)
[config] (Configuration)
[submenu] (Styles)
[stylesdir] (~/.blackbox/styles)
[sep]
[stylesdir] (/usr/share/blackbox/styles)
[end]
[workspaces] (Workspaces)
[sep]
[reconfig] (Reconfigure)
[restart] (Restart)
[exit] (Exit)
[end]
[end]
Otherwise, you can always start using a copy of the default one:
cp /etc/X11/blackbox/blackbox-menu ~/.blackbox/blackbox-menuHere you go! Enjoy! 😉
Raspberry Pi Emulator on Ubuntu 12.04 LTS
You have two options:
- Use a Ubuntu Desktop version with Gnome environment already preinstalled (do you really need all that crap?!)
- Install a brand new Ubuntu server 12.04 x64 LTS, basic, without Gnome or any super fancy packages… just a basic installation with SSH (suggested but not required). And after, just follow the post here to install a “Minimal X server”.If you want to change a bit the look of the login screen, you can have a look to this post.
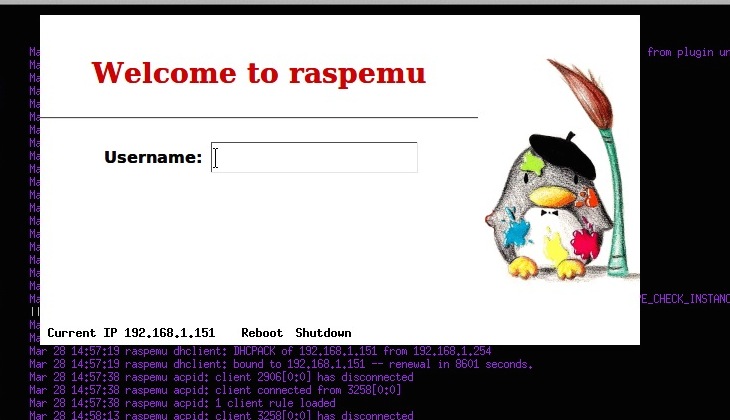
This is what I’ve done 🙂
Please note that a graphic environment is REQUIRED for this emulator to work.
Compile and install QEMU
Packages:
sudo apt-get install git zlib1g-dev libsdl1.2-dev libpixman-1-devWorking directory:
mkdir ~/raspidev && cd ~/raspidev/git clone git://git.qemu-project.org/qemu.gitIt will take a while
Once done:
cd qemu
./configure --help
Read the output carefully (options of interest highlighted):
Usage: configure [options]
Options: [defaults in brackets after descriptions]

Standard options:
--help                   print this message
--prefix=PREFIX          install in PREFIX [/usr/local]
--interp-prefix=PREFIX   where to find shared libraries, etc.
use %M for cpu name [/usr/gnemul/qemu-%M]
--target-list=LIST       set target list (default: build everything)
Available targets: i386-softmmu x86_64-softmmu
arm-softmmu cris-softmmu lm32-softmmu m68k-softmmu
microblaze-softmmu microblazeel-softmmu mips-softmmu
mipsel-softmmu mips64-softmmu mips64el-softmmu
ppc-softmmu ppcemb-softmmu ppc64-softmmu sh4-softmmu
sh4eb-softmmu sparc-softmmu sparc64-softmmu
s390x-softmmu i386-linux-user x86_64-linux-user
alpha-linux-user arm-linux-user armeb-linux-user
cris-linux-user m68k-linux-user
microblaze-linux-user microblazeel-linux-user
mips-linux-user mipsel-linux-user ppc-linux-user
ppc64-linux-user ppc64abi32-linux-user
sh4-linux-user sh4eb-linux-user sparc-linux-user
sparc64-linux-user sparc32plus-linux-user
unicore32-linux-user s390x-linux-user

Advanced options (experts only):
--source-path=PATH       path of source code [/home/shift/openembedded/qemu]
--cross-prefix=PREFIX    use PREFIX for compile tools []
--cc=CC                  use C compiler CC [gcc]
--host-cc=CC             use C compiler CC [gcc] for code run at
build time
--extra-cflags=CFLAGS    append extra C compiler flags QEMU_CFLAGS
--extra-ldflags=LDFLAGS  append extra linker flags LDFLAGS
--make=MAKE              use specified make [make]
--install=INSTALL        use specified install [install]
--python=PYTHON          use specified python [python]
--static                 enable static build [no]
--mandir=PATH            install man pages in PATH
--datadir=PATH           install firmware in PATH
--docdir=PATH            install documentation in PATH
--bindir=PATH            install binaries in PATH
--sysconfdir=PATH        install config in PATH/qemu
--enable-debug-tcg       enable TCG debugging
--disable-debug-tcg      disable TCG debugging (default)
--enable-debug           enable common debug build options
--enable-sparse          enable sparse checker
--disable-sparse         disable sparse checker (default)
--disable-strip          disable stripping binaries
--disable-werror         disable compilation abort on warning
--disable-sdl            disable SDL
--enable-sdl             enable SDL
--disable-vnc            disable VNC
--enable-vnc             enable VNC
--enable-cocoa           enable COCOA (Mac OS X only)
--audio-drv-list=LIST    set audio drivers list:
Available drivers: oss alsa sdl esd pa fmod
--audio-card-list=LIST   set list of emulated audio cards [ac97 es1370 sb16 hda]
Available cards: ac97 es1370 sb16 cs4231a adlib gus hda
--block-drv-whitelist=L  set block driver whitelist
(affects only QEMU, not qemu-img)
--enable-mixemu          enable mixer emulation
--disable-xen            disable xen backend driver support
--enable-xen             enable xen backend driver support
--disable-brlapi         disable BrlAPI
--enable-brlapi          enable BrlAPI
--disable-vnc-tls        disable TLS encryption for VNC server
--enable-vnc-tls         enable TLS encryption for VNC server
--disable-vnc-sasl       disable SASL encryption for VNC server
--enable-vnc-sasl        enable SASL encryption for VNC server
--disable-vnc-jpeg       disable JPEG lossy compression for VNC server
--enable-vnc-jpeg        enable JPEG lossy compression for VNC server
--disable-vnc-png        disable PNG compression for VNC server (default)
--enable-vnc-png         enable PNG compression for VNC server
--disable-vnc-thread     disable threaded VNC server
--enable-vnc-thread      enable threaded VNC server
--disable-curses         disable curses output
--enable-curses          enable curses output
--disable-curl           disable curl connectivity
--enable-curl            enable curl connectivity
--disable-fdt            disable fdt device tree
--enable-fdt             enable fdt device tree
--disable-check-utests   disable check unit-tests
--enable-check-utests    enable check unit-tests
--disable-bluez          disable bluez stack connectivity
--enable-bluez           enable bluez stack connectivity
--disable-slirp          disable SLIRP userspace network connectivity
--disable-kvm            disable KVM acceleration support
--enable-kvm             enable KVM acceleration support
--disable-nptl           disable usermode NPTL support
--enable-nptl            enable usermode NPTL support
--enable-system          enable all system emulation targets
--disable-system         disable all system emulation targets
--enable-user            enable supported user emulation targets
--disable-user           disable all user emulation targets
--enable-linux-user      enable all linux usermode emulation targets
--disable-linux-user     disable all linux usermode emulation targets
--enable-darwin-user     enable all darwin usermode emulation targets
--disable-darwin-user    disable all darwin usermode emulation targets
--enable-bsd-user        enable all BSD usermode emulation targets
--disable-bsd-user       disable all BSD usermode emulation targets
--enable-guest-base      enable GUEST_BASE support for usermode
emulation targets
--disable-guest-base     disable GUEST_BASE support
--enable-user-pie        build usermode emulation targets as PIE
--disable-user-pie       do not build usermode emulation targets as PIE
--fmod-lib               path to FMOD library
--fmod-inc               path to FMOD includes
--oss-lib                path to OSS library
--enable-uname-release=R Return R for uname -r in usermode emulation
--sparc_cpu=V            Build qemu for Sparc architecture v7, v8, v8plus, v8plusa, v9
--disable-uuid           disable uuid support
--enable-uuid            enable uuid support
--disable-vde            disable support for vde network
--enable-vde             enable support for vde network
--disable-linux-aio      disable Linux AIO support
--enable-linux-aio       enable Linux AIO support
--disable-attr           disables attr and xattr support
--enable-attr            enable attr and xattr support
--enable-io-thread       enable IO thread
--disable-blobs          disable installing provided firmware blobs
--enable-docs            enable documentation build
--disable-docs           disable documentation build
--disable-vhost-net      disable vhost-net acceleration support
--enable-vhost-net       enable vhost-net acceleration support
--enable-trace-backend=B Set trace backend
Available backends: nop simple stderr ust dtrace
--with-trace-file=NAME   Full PATH,NAME of file to store traces
Default:trace-<pid>
--disable-spice          disable spice
--enable-spice           enable spice
--enable-rbd             enable building the rados block device (rbd)
--disable-smartcard      disable smartcard support
--enable-smartcard       enable smartcard support
--disable-smartcard-nss  disable smartcard nss support
--enable-smartcard-nss   enable smartcard nss support
--disable-usb-redir      disable usb network redirection support
--enable-usb-redir       enable usb network redirection support
--disable-guest-agent    disable building of the QEMU Guest Agent
--enable-guest-agent     enable building of the QEMU Guest Agent
NOTE: The object files are built at the place where configure is launched
Easiest way:
./configure --help | egrep -i "PREFIX|everything|arm-softmmu|arm-linux-user|SDL"Then, compile and install:
make
sudo make install
Check that all is fine:
qemu-system-arm -cpu ?The output should contain ‘arm1176‘. If all is good, go to the next steps. 😉
Create the emulation environment
cd ~
mkdir raspemu && cd raspemu
Get the linux kernel:
wget http://xecdesign.com/downloads/linux-qemu/kernel-qemuDownload a raw image of Raspberry Pi from here and save in the same folder
wget http://downloads.raspberrypi.org/raspbian_latestIf you want to play a bit with it, you might need to pre-expand the file size, in order to have some extra space (by default you have only 200 Mb free on the current image).
For this, you can use the following commands, to add 2GB to the image:
dd if=/dev/zero bs=1M count=2048 >> path/your_image.imgThen, launch your qemu, and inside the console, try to useraspi-config script to automatically expand the filesystem.
Otherwise, try the following to do it manually (not tested):
PART_START=$(parted /dev/sda -ms unit s p |grep “^2? | cut -f 2 -d:)
echo $PART_START # (to be sure that it’s not empty).
fdisk /dev/sda <<EOF
p
d
2
n
p
2
$PART_START
p
w
EOF
Then reboot and launch resize2fs /dev/root
Now, you’re ready for the first boot.
Create a script called first_boot.sh with the following:
qemu-system-arm -kernel kernel-qemu -cpu arm1176 -m 256 -M versatilepb -no-reboot -serial stdio -append "root=/dev/sda2 panic=1 rootfstype=ext4 rw init=/bin/bash" -hda $1Remember to setchmod +xto this file and do not try to use more than 256 MB of RAM, the value is hard-coded in and QEMU will not work correctly.
After you can easily use this syntax to start your image:
./first_boot.sh path/your_image.imgComment the line/usr/lib/arm-linux-gnueabihf/libcofi_rpi.soin the file/etc/ld.so.preloadand reboot.
Alternatively create a file/etc/udev/rules.d/90-qemu.ruleswith the following content:
KERNEL=="sda", SYMLINK+="mmcblk0"
KERNEL=="sda?", SYMLINK+="mmcblk0p%n"
KERNEL=="sda2", SYMLINK+="root"
The kernel sees the disk as /dev/sda, while a real pi sees /dev/mmcblk0. This will create symlinks to be more consistent with the real pi.
Once done, you can create a new script called start.sh with the following content:
qemu-system-arm -kernel kernel-qemu -cpu arm1176 -m 256 -M versatilepb -no-reboot -serial stdio -append "root=/dev/sda2 panic=1 rootfstype=ext4 rw" -hda $1And now, finally, we can run our image of Raspberry Pi running:
./start.sh path/your_image.imgNOTE: use first_boot.sh script ONLY with a brand new image. If you’re using a copy of your Pi, maybe made using dd command, just use start.sh script.
Sources:
http://xecdesign.com/compiling-qemu/
http://xecdesign.com/qemu-emulating-raspberry-pi-the-easy-way/
How to change hidden attribute on a file on Mac – command line
Leave a Reply
To show a hidden file:
chflags nohidden path/to/fileTo hide a file:
chflags hidden path/to/file